Configuring Global Distribution – Nonrelational Databases in Azure
Configuring Global Distribution
Additional regions can be added to an Azure Cosmos DB account to replicate your data for high availability purposes. This can be done through the Azure Portal using the following steps:
- Click the Replicate Data Globally button under Settings in the left-side panel of the Azure Cosmos DB blade.
- From this page, you can add regions by either clicking on them in the world map or clicking Add Region and selecting one in the drop-down list. You can also choose to add a new write region using the Add Region button. Figure 3.13 illustrates how to add a new write region replica.

FIGURE 3.13 Adding a new write region replica
Configuring Consistency
The Azure Portal allows you to change the consistency level from the default session consistency to another. Simply click the Default Consistency button under Settings in the left-side panel and choose a new default consistency level.
If you choose the bounded staleness consistency level, you will be given the option to configure the maximum lag time and maximum lag operations. Figure 3.14 illustrates how you can change the default consistency to bounded staleness through the Default Consistency page.
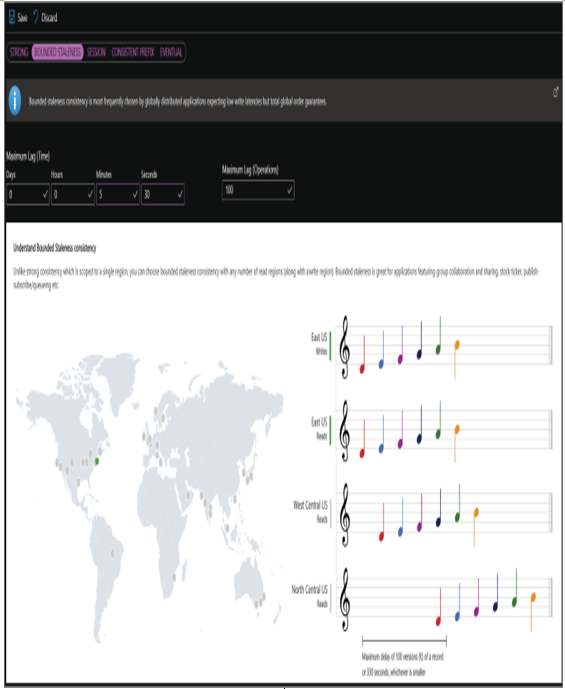
FIGURE 3.14 Updating the default consistency to bounded staleness
Azure PowerShell
Just as with relational databases in Azure, you can use Azure PowerShell to create and manage all components of Azure Cosmos DB. The following PowerShell script can be run on the Azure Cloud Shell or a PowerShell window to create a new Azure Cosmos DB account:
<#
Sign into your Azure environment. Not required
if running this script in the Azure Cloud Shell
#>
Connect-AzAccount
<#
Set the parameters needed to create the account
such as the resource group name, account name,
API type, consistency level, and replica locations
#>
$resourceGroupName = “dp900cosmos001”
$accountName = “dp900cosmos001”
$apiKind = “Sql”
$consistencyLevel = “Session”
$locations = @()
$locations += New-AzCosmosDBLocationObject `
-LocationName “East US” -FailoverPriority 0 -IsZoneRedundant 0
$locations += New-AzCosmosDBLocationObject `
-LocationName “West US” -FailoverPriority 1 -IsZoneRedundant 0
#Create the account
New-AzCosmosDBAccount `
-ResourceGroupName $resourceGroupName `
-LocationObject $locations `
-Name $accountName `
-ApiKind $apiKind `
-EnableAutomaticFailover: $true `
-DefaultConsistencyLevel $consistencyLevel
This script includes a few key parameters that are used to define the account:
- $resourceGroupName—The resource group that the Azure Cosmos DB account is going to be deployed to. The resource group must already exist.
- $accountName—The name for the account.
- $apiKind—The Azure Cosmos DB API that will be used for the account.
- $consistencyLevel—The default consistency level for the account.
- $locations—The replica regions for the account. The region with FailoverPriority set to 0 is the write region.
Azure PowerShell can also be used to create an Azure Cosmos DB database and container. The following script is used to create a new database in the newly created account with 4000 RU/s, as well as a container with 400 RU/s:
$resourceGroupName = “dp900cosmos001”
$accountName = “dp900cosmos001”
$databaseName = “dp900cosmosdb01”
$containerName = “dp900cosmoscontainer01”
$partitionKey = “/Id”
$databaseThroughput = 4000
$containerThroughput = 400
New-AzCosmosDBSqlDatabase `
-ResourceGroupName $resourceGroupName `
-AccountName $accountName `
-Name $databaseName `
-Throughput $databaseThroughput
New-AzCosmosDBSqlContainer `
-ResourceGroupName $resourceGroupName `
-AccountName $accountName `
-DatabaseName $databaseName `
-Name $containerName `
-PartitionKeyKind Hash `
-PartitionKeyPath $partitionKeyPath `
-Throughput $containerThroughput
More information about creating and managing Azure Cosmos DB objects with Azure PowerShell can be found at https://docs.microsoft.com/en-us/azure/cosmos-db/sql/manage-with-powershell.